Adding dynamic content to an Engage Creative allows you to extend the personalisation of your customer communications by including HTML components mapped to customer criteria, creating conditional displays, and applying dynamic content mapping.
Create HTML Components
-
Open the Create window (+ icon in main menu).
-
Within Campaigns, select HTML Component.
-
In the properties pane, select if the HTML Component is to be used for classic or triggered campaigns.
-
Within the HTML editor window, enter the code associated with the customer attribute to be defined, e.g. if creating banners for use with gold, silver and bronze tier customers, you would create three separate HTML Components with <img src=”…”> HTML for the associated images.
-
Open the hamburger menu and click SaveAs.
-
Give the HTML component a name and save the object.
Create Conditional Displays
Some content may not be appropriate for all users, or you may want a specific row to only be visible to certain customers. To add conditions to your content to control what each user sees:
-
Insert the content you wish to make conditional, e.g. custom image, exclusive URL, etc.
-
Click on the Rows tab to open the row properties.
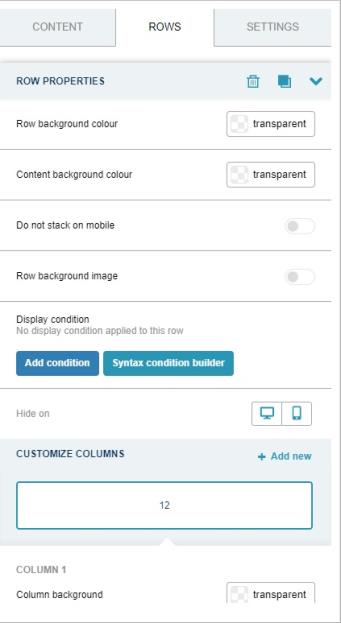
Note: Ensure the content is selected to get the row properties to display. If the content is not selected, the Rows tab will only display column options.
-
Click on the Syntax condition builder to open the Add display condition window.
-
Give the condition a name and description.
-
Enter the syntax for your content. You can use the Test button to verify the syntax is input correctly.
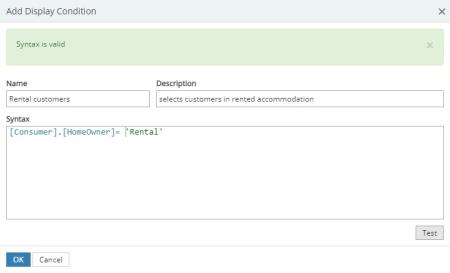
-
Click OK to assign the conditions to the row.
-
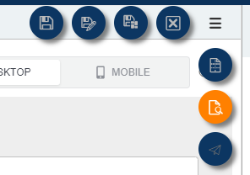
Once you have added all your conditional displays, expand the hamburger menu and click the preview button.
-
Use the Select row display conditions to view each of your email versions and check they display as intended.
-
Once you are happy with the layout of each conditional display, open the hamburger menu and save your creative.
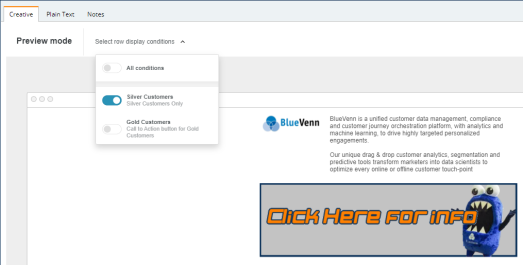
Example: The following Call to Action buttons are conditional upon customer status, i.e. gold banner for gold customers and silver banner for silver customers. These can also have different URLs, to take customers to different sites.

Conditions are added for which customers will view the Gold CTA button and who will view the Silver CTA button.

In preview mode, selecting the Gold Customers condition displays the email seen by gold customers.
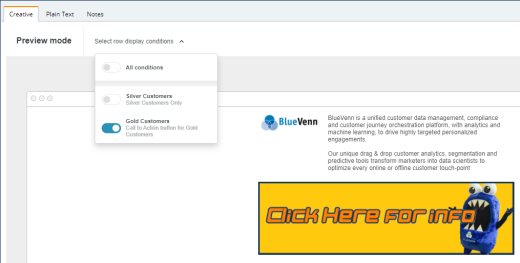
Selecting the Silver Customers condition displays the email seen by gold customers.
Apply Dynamic Content Mapping
-
Open the Create window (+ icon in main menu).
-
Within Campaigns, select Dynamic Content Mapper.
-
Select a source from the dropdown menu in the Editor window.
Note: The source could be a table entry from the database or a previously created Priority Matrix.
-
Assign a mapped object to each of the mapped values for the chosen source, e.g. if selecting customers based on type (i.e. gold, silver or bronze loyalty tier) you would assign a gold tier object to gold tier customers, etc.

-
Save the mapped objects and values.
-
Open or create a new Creative.
-
Drag and drop the dynamic content option from the content list to the desired location within the creative.
-
Click on the inserted dynamic content to open the Content Properties pane.

-
Click Choose dynamic content and select a previously created dynamic mapping to call content personalised to the customer, e.g. display gold tier promotional offers for gold tier customers.
Note: You can stack multiple dynamic content blocks, e.g. stacking offers from a priority matrix so that the creative includes the first two eligible offers according to the matrix’s prioritisation criteria.
-
Save the creative for use with an Engage Campaign.